Reflection photography is a challenging and special sort of photography that requires a good grasp of angles and perspective and an ever-vigilant artist’s eye. Using reflection photography will help your artwork become more stunning and to attract reader’s eyes. So, as you own a beautiful pictures and want to add a reflection photography, what will you do?. Below are some basic tips that support you add a reflection in Photoshop.
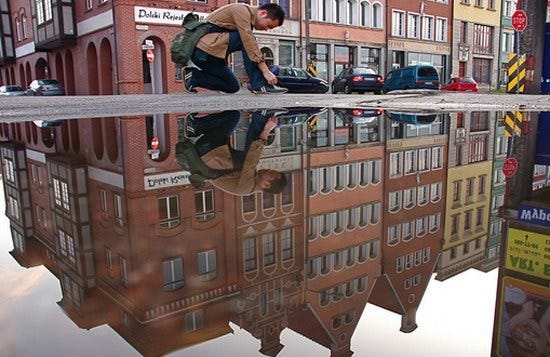
Making a reflection in Photoshop seems simple enough, and for the most part — yes, it is a quite easy thing to accomplish.
First, you could use Adobe Photoshop Elements or even GIMP to do this tutorial. Here, we will use and open Adobe Photoshop. Let’s choose one images to make a reflection in Photoshop. When the image has been opened in Photoshop, you will need to make it bigger to fit the reflection. If you don’t want to use this tool, you can do this by using the Crop tool. It’s a great way for your work.
Adobe Photoshop
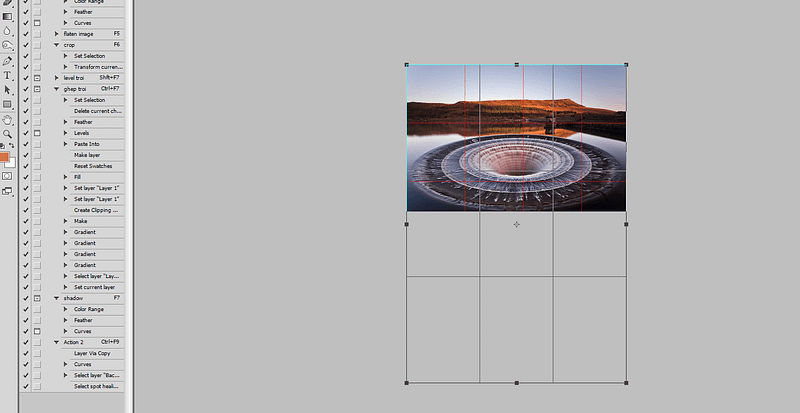
You can double the size of the original image, simply by dragging down the point at the bottom of the image using the Crop tool. If the overall size is too big, you can always crop it down once you are finished with the photo.
To duplicate the original image to new layer, you have two ways:
– You can use by pressing Ctrl + J
– Click Layer-> Duplicate, then go to Edit > Transform > Flip Vertical.
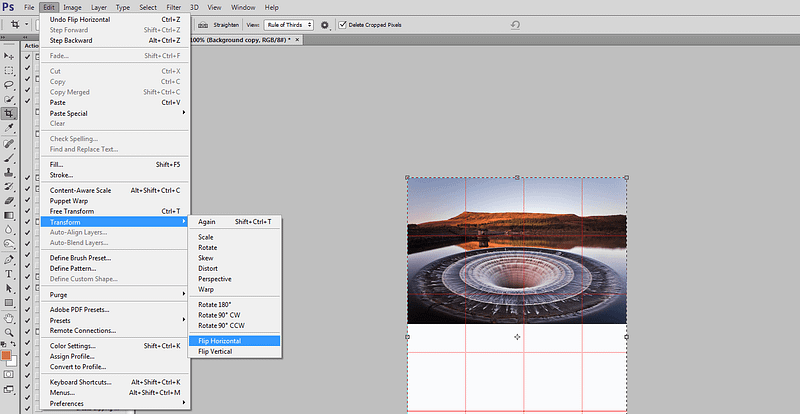
If you do the vertical flip in the Image menu you will flip all layers, and for this you only want to flip the one layer. Using the Move tool, the first tool in the tool bar on the left, the cross shape (symbol is V). Click on the duplicate layer and move the image. You should choose where the image finishes, and we will begin the reflection.
Next, adding a mask to the flipped layer and click on the brush tool so you remove some of the image. You can add a mask by using the icon at the bottom of the layers panel or go to the Main Menu > Layer > Layer Mask > Reveal all.
Using the Move tool, shift your image up to meet the original, at the line between the image and the reflection.
Seconds, you need to refine the reflection. Let’s add a blank layer to your image, then drag it down to be the bottom layer. In case, you can’t do that, it may be because the original image layer is locked and called the Background layer, you need to check and fix them. In addition, if you want to remove that, double click on the word Background, you should be able to change the name to something else. This will allow you to move the new blank layer to the bottom.
Two images layers will be appear, you should turn off two image layers so they disappear by clicking the eyeballs on each. Or choosing the Paint Bucket Tool, it is with the gradient tool, right click and you will see the bucket tool.
Then, you can select the background colors of your reflection by opening the foreground. It is good to go with something dark, and a similar color to your image. When you have chosen your color, fill the layer with it and turn the other two layers back on. Select the layer that is the reflection and go up to the Opacity Slider which is just above the layers panel. Turn the reflection layer opacity down a little. Just make it slightly less bright than the original.
To remove any part that is now no longer needed, you should select the Crop tool.

Thirds, to complete a reflection in Photoshop, you can fade the reflection. Let’s add one more blank layer, then choose the gradient tool. You can add some Gradient to the bottom of the image to help it blend in. If you are not getting the gradient to work so that you are getting the foreground to transparent, you will need to select that option in the tool options bar at the top under the main menu. You may also want to change the opacity of the tool to around 50%. And finish picture, you will have a great reflection photography.
Do you have other methods to add reflection in Photoshop?. Please share your experiences in the comment below.
Below are tutorial video to support your project!
Thank you for watching!.
Nhận xét
Đăng nhận xét